The Mail log page is accessible to all mail users that can log onto the website.
Standard users will be able to view logs for their own mailbox only.
Administrators will be able to select between options and view logs for the entire establishment. See below for system administrator capabilities.
To see additional columns on the mail log table, please click the Show More button.
Viewing "My email"
This is the option selected by default. Standard users will have no additional options. Administrators can select additional options from the dropdown menu.
Note: As the MailProtect system is fully integrated with USO, individual users in schools using their own local mail servers will not be able to use the MailProtect site as their mail addresses usually cannot be matched against their USO usernames by the system. In such circumstances, only mail administrators will be able to use the MailProtect site and only to view emails for the domain. Administrators will not be able to use the "View all emails for a particular user" function. Users who are not Administrators will not be able to access the site at all.
By default, opening this page will display blocked emails from the last 24-48 hours but another date range can be selected using the calendar.
The Search box can be used to search the "From", "To" and "Subject" fields.
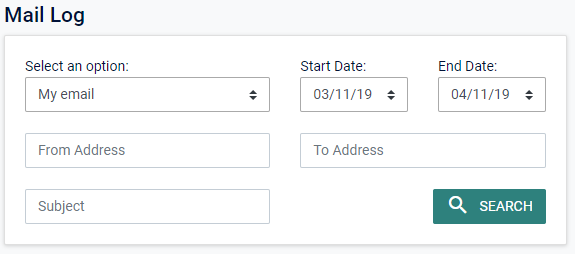
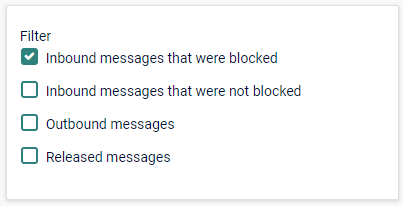
The default view will show messages that were blocked. However, you can also view messages that were not blocked or messages that were sent out from the account by selecting a different tickbox.
The Filter menu offers the following options:
•Inbound messages that were blocked - This refers to any blocked messages. You will be able to view various message details to help you determine whether the message should be released.
•Inbound messages that were not blocked - This provides a log of inbound mail that successfully reached its destination. No message details will be available.
•Outbound messages - This provides a log of all outbound mail. No message details will be available.
•Released messages - This provides a log of messages that have been released from quarantine into the user's account.
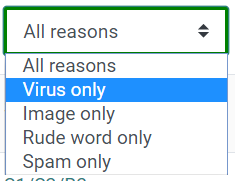
You can also filter the list by the reason that messages were blocked.
Select from the Filter by block reason on the table. This will only be useful whilst also ticking Inbound messages that were blocked
To use the page, click Search once you've defined the search criteria.
The information presented in the blocked email list will include the following:
Date: The date and time the email was received by the MailProtect system.
From: The sender's address. Sometimes this will also show "displayed as" details if the sender's displayed address is different from the actual address. Please be aware that the search can go back no more than 28 days.
To: The address of the mailbox, owned by the user, to which the message was addressed (this can be the primary email address or an alias).
Subject: Shows whatever appeared in the subject line of the blocked email

Reason: shows the code of the reason that the message was blocked. Possibilities include the following codes: S1, S2, V1, V2, V3, B1, B2, R0, P1, W1, A0. The codes are explained in a pop-up window that is produced by clicking on any of the codes. The code which applies to the specific message being blocked will always be highlighted.
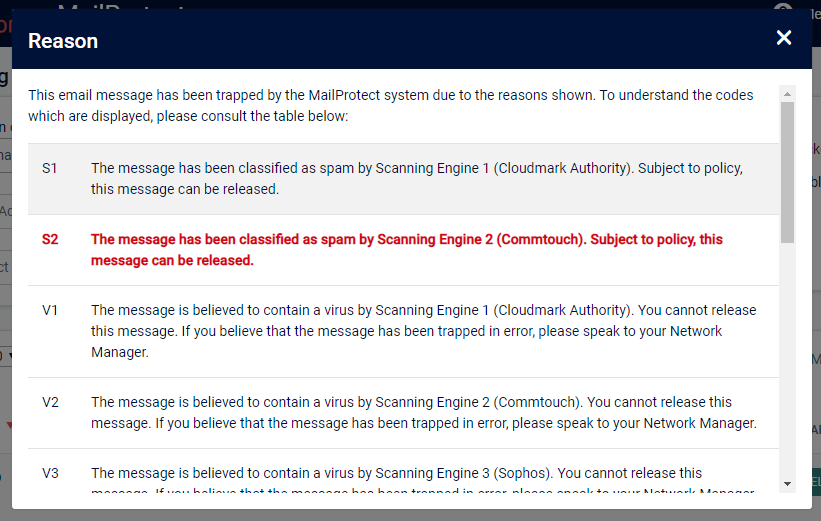
Release: Some blocked emails can be released from quarantine while others can't. If an email is classed as Spam or Bulk, for example, it should be possible to release it. If an email is classed as a Virus, it will not be possible to release. When releasing is not possible, a link will not appear in this column. To release several messages in a single action, click the Bulk Release button above the table, tick the boxes for the relevant messages and then click the Release selected button which will appear at the top of the screen.

Details: This will allow you to see the details of a blocked message. Clicking on the link will open a page, containing links to further information and offering options regarding future email from the sender.

To see additional columns, please click the Show More button. This will then show more information including:
Size: The file size of the message.
Country: The originating county of the message.

Releasing messages
To release a message from this screen without looking into the details, simply click the Release link next to that message.
To release multiple messages in a single action, click the Bulk Release button above the table, tick the boxes for the relevant messages and then click the Release selected button which will appear at the top of the screen, as pictured above.
Once messages have been released, they are no longer available in MailProtect. Please ensure you file them appropriately in your inbox so you can find them in future.
Releasing messages with a W1 code
If a message has been blocked due to rude words (the code shown is W1), it may be possible to release it. Click on Magnifying Glass to view more information.
Depending on the policy covering your establishment, it may be possible to release such an email from the Message Details page. If so, a Release button will appear.
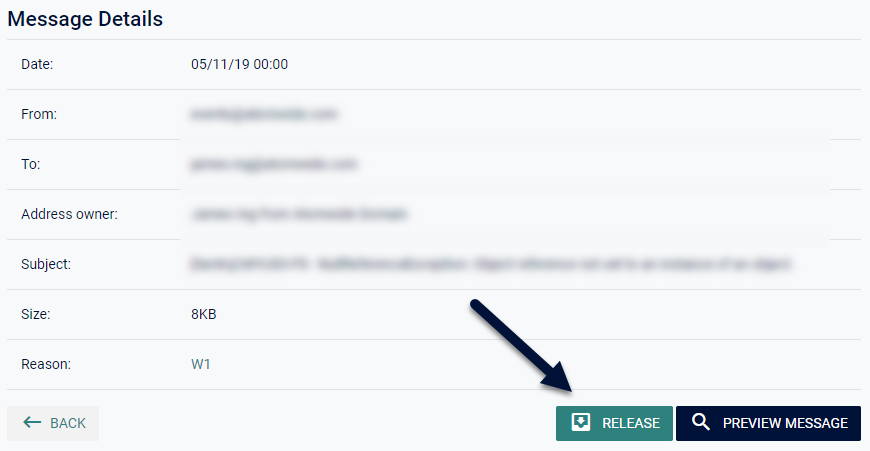
Details page
The Message Details page will allow users to see information contained in the blocked message to help decide whether the message is desirable or not.
Click on the Magnifying Glass for any message to access more information.

When possible, a preview of the message will be available.
The Message Details page offers information about the email and will allow you to make decisions about how messages from that sender should be treated in the future and create appropriate rules.
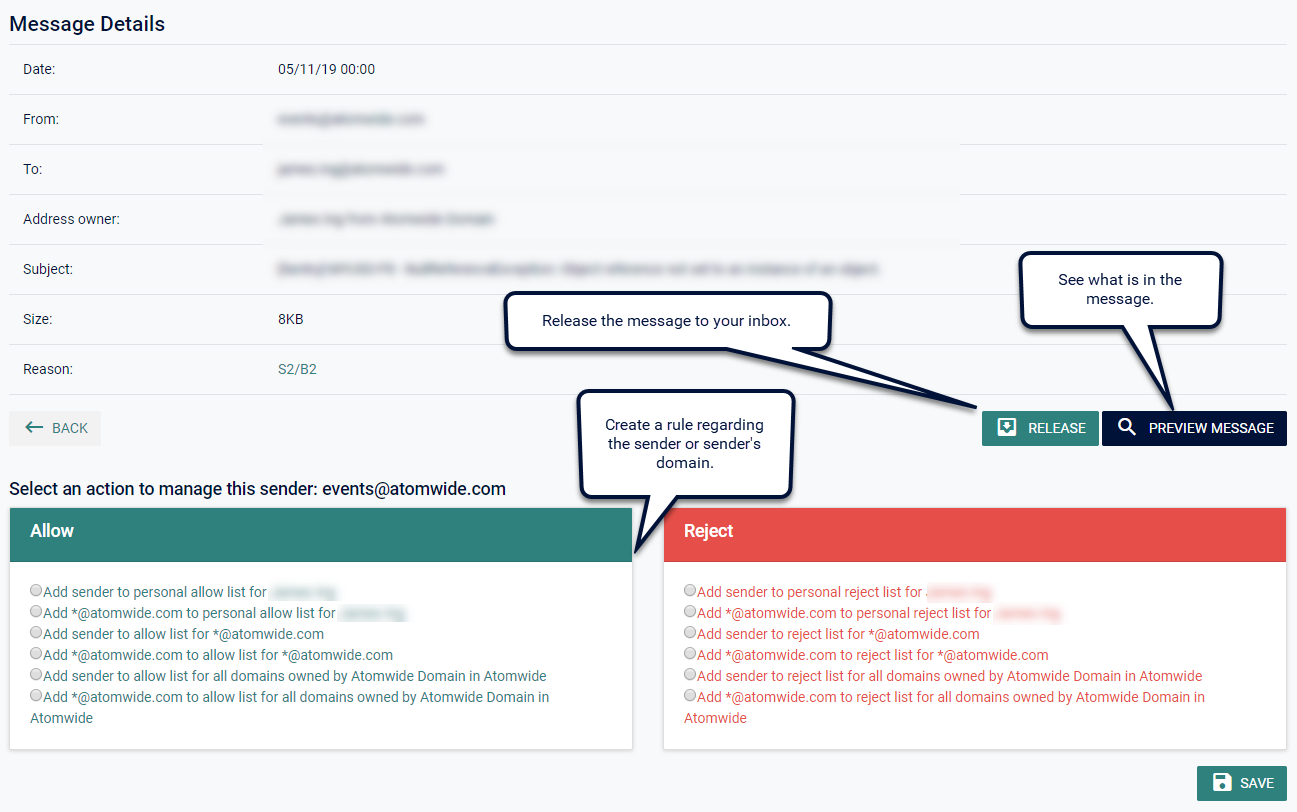
To release a blocked message click the Release button. The email will then be sent to your mailbox.
If unsure about the message, you may have the ability to preview its contents and decide whether it should be released or not.
Click the Preview message button. This will open a new tab or window in your browser.
You will then be able to see the message or information about the message in a variety of formats.
Creating rules for managing senders
You can decide to permanently allow or reject the sender of the email in a variety of ways.
Allow / Reject rules
Standard email users can permanently add the sender's address to their personal Allow or Reject list.
Alternatively, the sender's entire domain can be added to a user's Allow or Reject list so that everyone or no one from that domain can get through.
Administrators have further abilities to add the sender's address or the sender's entire domain to their personal list or any domains owned by the establishment where they have administration rights. However, administrators can't edit users' personal allow and reject lists.
When creating these rules, there are various options, of which only one can be selected for any given sender.
The Allow list:
To specify an address or a domain as Allowed means that future messages from that sender or domain would be exempt from being classified as Spam. This means that even if the message is considered to be Spam, it will not get blocked. However, if the message contains a virus, rude words or pornographic images, it will get blocked by the system.
The Reject list:
To mark an address or a domain as Rejected means that future messages from such addresses will be blocked. These messages do not get quarantined and are not available for release later on. These messages are logged and shown as "Rejected" but they cannot be released.
Please Note: Logs and quarantined messages are available to view for 28 days only.